Direct Entry
Import Charges toolbar button
Lookup toolbar button
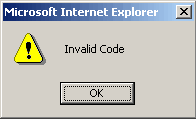
Position the cursor in the "Project String" field and enter the number. Enter the complete Project String with periods between the number segments. If a Project String that doesn't exist is entered the following message will appear.

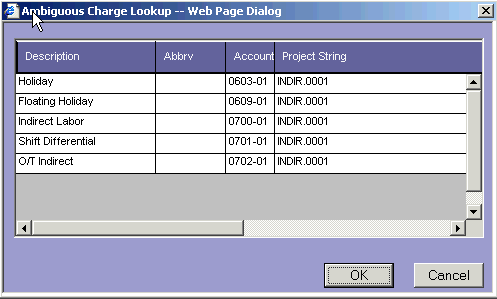
If you enter "INDIR.0001" in the Project String field for indirect labor, holiday or floating holiday, the following dialog box will be displayed once you move to the next field.

The columns in the figure above have been rearranged to highlight the differences between the pay types. The five descriptions listed above all use the "INDIR.0001" Project String creating the "ambiguous" entry. Highlight the appropriate charge and press the "OK" button.
Once you enter a valid Project String WebET will automatically fill in several of the other fields. Based on the type of Project String recorded WebET will default data in the Labor Type, Org Abbrev. and Pay Type fields.
Importing Charge Information
If the charge codes for this period are the same as the
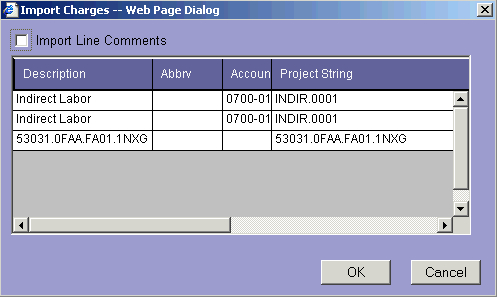
prior period select the Import Charges toolbar button  .
A dialog box similar to the following will be displayed. The exact charge
code will vary depending on the contents of your previous timesheet.

Select the charge codes you want to import and click "OK".
|
If you want to select multiple lines hold down the "Ctrl" key while highlighting each line. |
If this is your first time using the WebET timekeeping system the charge codes from your last non-WebET time sheet will be available using the Import Charges function.
If you want to record hours worked against a charge code already existing on the timesheet skip this step.
Select the Add Line toolbar button  or move to the next
timesheet line. The next line on the timesheet is now available for recording
charge information/codes. Follow the Charge Information process described above.
If this is the first time you are charging a project, position the cursor
in the Project String field on the charge information (left hand) side
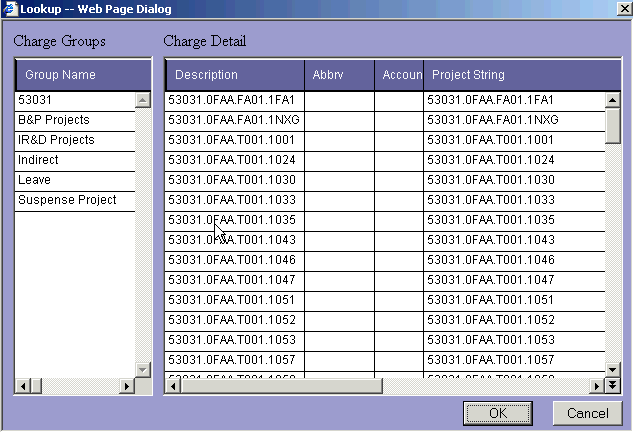
of the timesheet. Select the Lookup toolbar button  .
.

On the left side of the dialog box are "Charge Groups". These groups are CACI vehicle numbers plus "Indirect","Leave", "B&P", "IR&D" and "Suspense Project". The vehicle numbers will vary depending on which projects you are authorized to charge. All employees will see the "Indirect", "Leave", "B&P", "IR&D" and "Suspense Project" charge groups. On the right side of the dialog box are the individual Project Strings. When you highlight a charge group the Project Strings for that vehicle will be displayed. If the reference table (project strings, PLCs) you are using is large, only a 100 items are displayed at one time. You are able to page backward and forward through the table retrieving 100 records at a time. To select a Project String, highlight the vehicle number on the left and then highlight the Project String on the right. Press the "OK" button and the Project String will be recorded on the timesheet along with appropriate default data in other columns. You will need to enter a Labor Type into the timesheet before you can enter hours.
The column your cursor is positioned in will dictate the contents of the dialog box. For instance if the cursor is in the Org Abbrev. field then the dialog box will display department numbers.
If the project string you need to charge is not available contact your direct reporting manager. Record a suspense project code in the field(s) that is unknown. Record the corresponding hours and immediately inform your manager.
Position the cursor on the timesheet hour's
grid for the charge code and day you want to charge against. Enter the
hours worked and press [Enter]. Repeat this process as many times as necessary
to allocate hours worked to the correct charge codes. The "Save"
toolbar button  should be available, not grayed out. If not,
move the cursor from the field just entered, press the "Save"
toolbar button to save the timesheet, and close the WebET timekeeping
system.