 How do I securely share
data with Open shares on your Computer: How do I securely share
data with Open shares on your Computer:
How do I securely share
data with Open shares on your Computer: How do I securely share
data with Open shares on your Computer: Sharing data with other users can be done securely with
open shares. It
requires the end user to use due diligence and close the open share when
it’s no longer needed. Please
note some CACI offices do not allow file sharing via this method. Please
check with your local Technical Point of Contact for details.
Sharing data with other users can be done securely with
open shares. It
requires the end user to use due diligence and close the open share when
it’s no longer needed. Please
note some CACI offices do not allow file sharing via this method. Please
check with your local Technical Point of Contact for details.
Follow Steps 1-5 to create a share folder, open access to it, and finally close access to it when it’s not needed anymore.
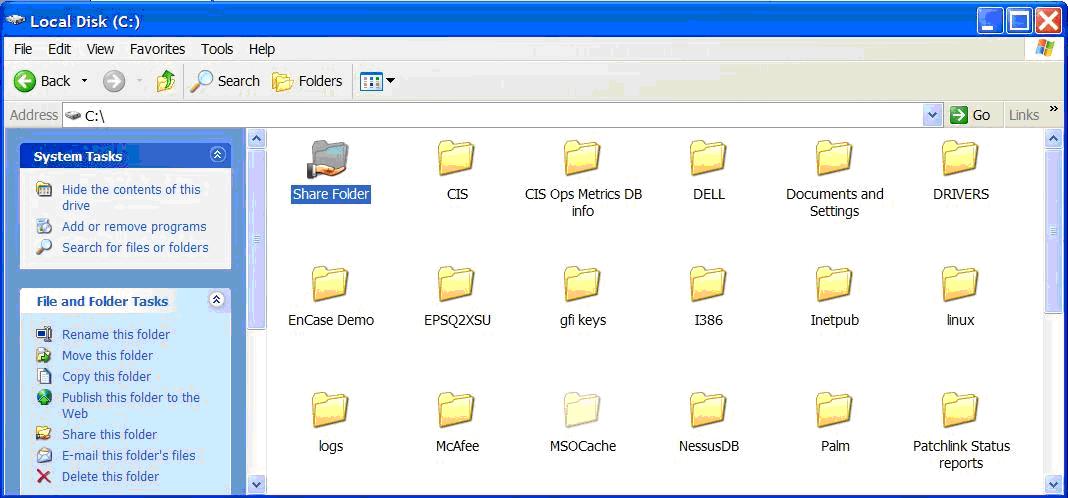
1. Create a folder to store your files/data
you plan on sharing. First,
navigate to your C drive and choose File, New, Folder from the toolbar.
In this
example, the new folder is called Share Folder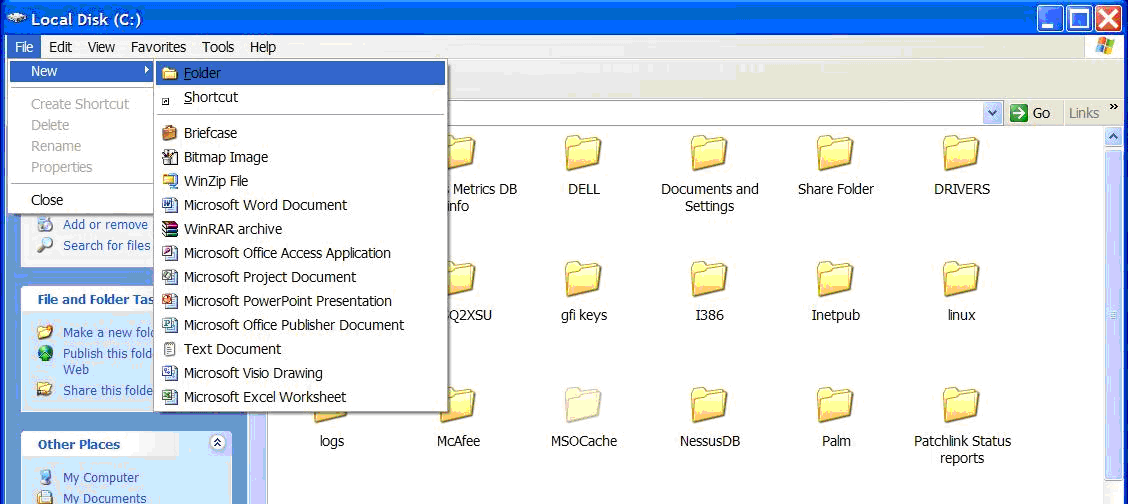
2. Next, right click on your share folder.
Choose
Sharing and Security. Click
on the Share this Folder option and click on Allow this number of users
and enter the appropriate number for yor needs. For
this example, we are choosing 1 user (jaltman) 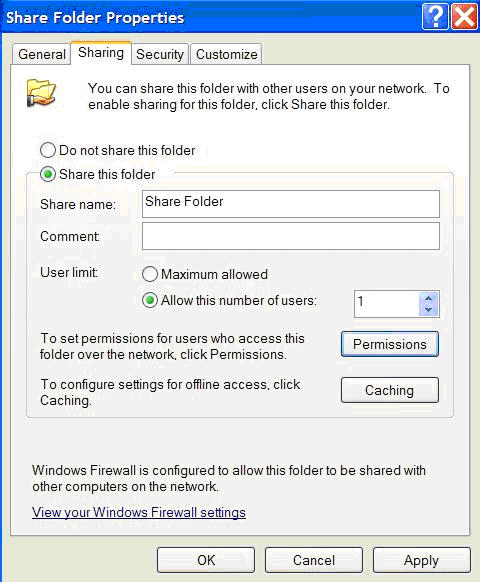 .
.
3. Next, click on the Permissions button and this window will appear.
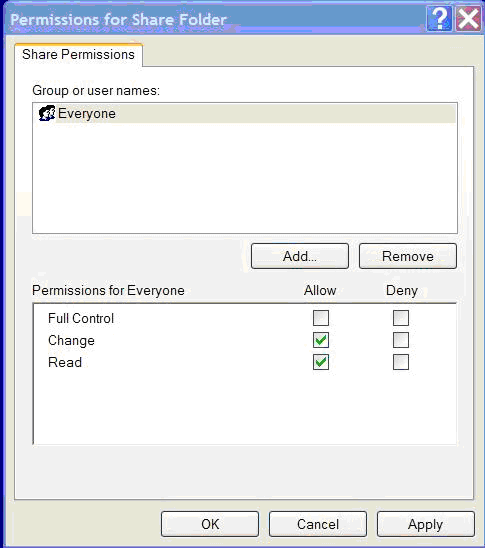
First step here is to remove the Everyone group from the Permissions list. Highlight Everyone and click Remove.
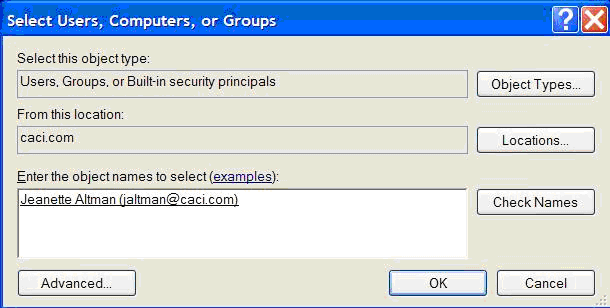
4. Next step is to enter the name of the user you wish to give permission. Click on Add. Enter the name of the user (use the CACI email format ie. jdoe) and click on Check Names. If this is a valid user, their name will appear as shown below. Click OK and then Apply. XP shown below.
Windows 2000 shown below:

Once this is done, if you navigate back to your C drive and look at your share folder, you’ll see a hand under the share folder.
You have now established permission for your user to access your share. Now you can place documents into this folder to share with the user.
Note: all files in your share will be accessible by the user. If you have other folders or files in your share that you do not wish to have viewed, contact the TAC for assistance.
5. After the user has finished accessing the file, remove the user from the permissions list. This can be done by repeating Steps 2 & 3 but highlight the name of the
Copyright © 2004 CACI. All rights reserved.